Tuesday, May 17, 2016

HOW TO MAKE A 11 INCH COOKIE TOP WITH MORE COOKIES

HOW TO MAKE A 11 INCH COOKIE TOP WITH MORE COOKIES

Do  you want to knock the sock off your kids or hubby, this is a great way to surprise someone.   Because who is ever expecting a cookie this big?   My hubby sure was not.  He has been doing such amazing work with his Chico State finales that I just had to surprise him.  And yeah you could say he was surprise.  He was red in the face and laughing.  And why for the life of me I didn't take pictures of the process.


Things you need:
Large size parchment paper.
16 inch pizza pan.
Non stick spray.
Pencil
11 inch plate.
Scissors
big bowl for mixing.
Plastic spatula

INGREDIENTS:
3 Medium Avocados or 2 Large. (Ripe, but not mussy)
4 Table spoons of butter
1 cup sugar
1 cup brown sugar
4 Teaspoons baking soda.
2 Table spoons Mayonnaise
1 Bag of Chocolate chips.  (I used one) but if you want to make it more chocolatey use two.
4 cups of flour (about)

METHOD OF PREPARATION:

Tear off a really piece of parchment that is bigger than 11 inches.  Put on the cutting board and place the 11 inch plate face down on it and trace around it with the pencil.  Now very with the scissors do not cut on the line, but rather leave a two inch space as you cut the excess parchment paper off.
Put the parchment paper on the pizza pan and spray with non stick.

FIRST: MIX   (I like to use my metal spatula that flexes, stiff ones don't work well.)
 Cream the butter and Avocados in a bowl with your weapon of choice, when it is thoroughly mix together creamed add the white sugar, brown sugar, baking soda and mayonnaise incorporate well.  Then mix in the bag of chocolate chips.

SECOND: Mixing in flour
  Now add a cup at a time of flour and mix it in.  Keep on doing this with the flour so you don't overwhelm the batter. The batter should be very moist and slightly sticky.  If you add too much flour it will overwhelm the batter and your cookies will turn into hard lumps.  This is why you add a little at a time to the batter. One way to tell if the batter is good is as you mix it. You can check it by digging in to the batter and if you get a big chuck of it to stick to the spoon when you lifting it up and it does not fall off it's ready.  It should be slightly sticky enough to stick to the spoon, but not enough to fall off.   And you still should have to coat your hands in flour to keep the batter from sticking to your hands.

THIRD: SHAPING.
 Grab the pizza pan with the round parchment paper stencil on it.   Pour out the cookie dough on to the parchment paper.    Note you do not need to hit that line exactly, I didn't, it is just a guide.   Flatten out the dough with floured fingers and use a plastic spatula and presses it down and spread it out on the parchment paper.  The cookie should be about 1 inch thick or less, about too your fist knuckle on your index finger, the on right behind your nail.  Don't count your nail if their long.   Keep flattening it out.  I left about another two inch space from the line.  Next use the plastic spatula to press the edges of the cookie flat.  Keep working around, if you need to add more dough to fill in gaps.  You should have a good amount of dough left over for making the other cookies to top it.  When you done you should have a ll inch side cookie.

 Next:  Make four regular size cookies.  Lightly flour the cutting board and press the cookies out and then press on at the top, bottom and put to at each side.  Just press them in gently.  Now make even smaller cookies and press them out and fill the spaces between the medium cookies. Don't worry about over laping.   And last but least make even smaller cookies flatten out and top the smaller cookies.  I have a total of 16 cookies on top of the large cookie.  You don't have to be prefect, just slap them on. 

FOURTH: BAKING : Take care and keep watch because not all ovens are alike.  

Bake at 375 to 400 for 45 to 50 minutes. When it is golden or you see golden areas on the edges of the cookies on top.  

CAREFULLY:
Have a good size strong cookie rack ready.   Remove cookie from oven and slide on to cookie rack. Pull on the parchment paper to help slide it.  As soon as the pizza pan is cool enough to touch, use the parchment paper to pull the cookie half way on the the pizza pan, then very carefully remove the parchment paper and return to rack.  Let cool for at least 25 minutes, before you try to slide it on to a plate.

Have fun surprising someone you love.  :)   And make sure their is enough milk.


Sunday, May 15, 2016

HOW TO MAKE YOUR VEGGIES LAST AS LONG AS POSSIBLE

HOW TO MAKE YOUR VEGGIES & FRUIT LAST AS LONG AS POSSIBLE

NOTE: These are just my methods. I'm not a scientist in this department of food.  So exacting details about how long the food will last in your refrigerator, I would not know.  I just know it works for me and my food has lasted one to two weeks longer.  And from the farmers market the food has lasted even three weeks longer.    

 And also consider it depends were you live too.  Dry and Wetter climates effect cooking, it also effect the refrigerator settings.  It's up to you to find out how to fine tune your refrigerator. 


You get home with all your veggies and you put them in the crisper and you use some up and then a few weeks or two go by and you realize that some of them don't look to hot and you half to throw them out. 

HERE IS THE ENEMIES OF VEGETABLES.
1. Moisture.
2. They can't breath.
3. Other food.  Yes other food will explain.
4. Improper refrigeration setting.
5. Air exposure.
6. You.   Just had to add that one in.  ;)

Basically everything is out to kill your veggies, but their are way to slow down the process so your veggies last as long as possible. 

HERE IS WHAT THESE ENEMIES DO:
MOISTURE.  Veggies like to stay nice and dry as they chill in the crisper or any other area of the refrigerator.  If the moisture build up is too much this will seep into the pours of the so call veggies and it will create an ideal place for mold.  Yuck.

THEY CAN'T BREATH: 
Your food is still alive and it is still exchanging gases thought the skin and that gas is getting trapped in the bag you put it in. Veggies need to breath.  


OTHER FOOD:
All the food in your refrigerator is releasing gases.  And those gas cause other food like veggies to ripen faster or if left unchecked for too long, rot.  

IMPROPER REFRIGERATION SETTING:
It's is so important to learn what the proper setting are on your refrigerator.   If you have frozen items in your refrigerator. You need to fix the settings, this can damage veggies and speed up the spoiling process.


AIR EXPOSURE:
If you leave your veggies uncovered and unprotected they will wilt and die.  Ever grabbed a celery out of the refrigerator and it's limp, like really limp that is why.  If you have carrots and celery like this use them for soup.  Cut the bad spots off.    Think of it like this you have a plant you water and it's a happy plant and stand straight up.  You forget to water it for a week, and it look so sad.  You water it and it's happy again.

METHODS FOR PROTECTING VEGGIES!
These have really worked for me I hope they work for you. 

Everyone puts there veggies in plastic baggies.  Well almost every one.   And they you use a twist tie to keep the food from falling out.  Every one got their own method. And some people don't use plastic bags.

You come home with your lettuce. Save the plastic bag it came in.  It's already wet from being sprayed so take it to the sink and gently shake it off as much as possible.   Then Turn the plastic bag inside out. Dry of the out side with a towel, if you don't the moisture will affect other items.   Gently wrap on lose piece of paper towel around the lettuce.  Place in bad, do not close with twist tie, but rather let it be.  This allows the lettuce to get air, but not be exposed to air.     Ok so you want to use your lettuce take it out remove what you need and check the paper towel, is it still dry?  Is it damp, or does it look like it needs to be changed.    Once again if it needs to be changed pull out the lettuce discard the paper town.  Turn the plastic bag inside out and dry off the out side.  Add new paper towel and return to the refrigerator.   Sound like a lot of work, but in the long run, it saves you money.  

When you see moisture eliminate it by cleaning it off the veggie and inverting the bag on a dry towel so it absorbs the moisture   

 Is your crisper at the right setting it self?  Don't fill up the veggie crisper to the max, this will speed up ripening process.   Each item should have enough space to get adequate breathing room. Make sure the Crisper it's self is clean and dried and has either paper towel lining or a clean towel to absorb extra moisture. 

If you must place some veggies outside of the crisper keep all the veggies at the bottom. If your veggies have frozen spots your refrigerator setting needs to be changed to the proper settings.  Space them out on the bottom for maximum breathing space. 

Just try to make sure all the bags with veggie in them are open to vent.   If you put your veggie in a bag with a twist tie and leave it in the refrigerator or crisper that amounts to veggi-side.   The gas build up in the bag and moisture too and were their lost of moisture there mold. 

Garlic, Onions, Potatoes or any other starchy food are no no for the refrigerator or crisper.

Make sure all the other food in your refrigerator is sealed securely because this also can speed up your food ripening process and create more moisture.     The sandwich you left for your husband has pickles and mayonnaise on it and maybe the plastic wrap is not secure enough or a half drunken soda pop.  Their are many things.   So make sure all food is sealed safely.

Yes it is virtually impossible to keep your veggies from releasing gasses, which cause other veggies to ripen quicker.   Think about it like this it's like playing chess in your crisper, you are always trying to stay one step ahead. 

The setting of your refrigerator will really determine how long your veggie will last.  So if your not sure get the guide out or google it.  It's so important.

Ta ta for now.  :)

Saturday, May 14, 2016

BLACK BERRY & MULBERRY SMOOTHIE

BLACK BERRY & MULBERRY SMOOTHIE
  Yummy!

INGREDIENTS:
2 cups of mulberries White, black, blue or Red.
1 cup of black berries.
1/2 cup sugar less with reservation.
These were really super sweet berry's so I almost added no sugar.
2 cups of crushed ice (optional)
1 cup water or milk

BLENDER VERSION:
Put berries in blender with milk or water.  Pulse until smooth.  Look for the smoothie symbol on your blender if it has one.
Add ice cubes and pulse. If the mixture is too thick add a 1/2 cup of water or milk.


NO BLENDER VERSION;
Blender smender.
You'll need on metal bowl, one plastic bad that is clean or plastic wrap and a potato smasher.
Put all the ingredients in a bowl.  Now get your self some plastic wrap enough to cover the bowl, but don't cover the bowl just yet.    Put the potato masher in the middle of the bowl  and then put the plastic wrap over the handle and as you go down poke the handle thought the plastic wrap.  Cover the bowl with the handle sticking out of the plastic wrap.   Saves you from getting splattered.  Now if you want to skip this step and go right to smashing go for it.   Smash like their no tomorrow.

Next get a plastic bag fill with ice cubes.   Put the bad in between a towel,  Use a hammer to break the ice up.   The towel keep the bag from breaking.  Break it up as much as you can does not have to be prefect.  Add to smoothie.  
 

mmmmm this was so good.    Enjoy your treat.

Friday, May 13, 2016

BASIC TUNA SALAD

 I was reading a comment on another site recently and a lady snapped "Why doesn't he just learn to cook."    It's easy to tell some to do something that come easy to you.   You don't just wake up one day and all of a sudden your cooking and chopping and making all sorts of stuff.  If that was the case I want to wake up and man the space shuttle.   That's not going to happen.  And yes Space shuttle and cooking are apples and oranges, but they both have these thing in common, they both require skills and it lot's of practice.  Well the Shuttle a whole lot more of practice.   That is why I'm making these recipes as easy as possible.   Cooking is very intimidating to some people,  they see all the flair on TV and got holy crap I'm going to do that.      And another thing to think about when cooking. Slow down it's not a race.   TV cooking is unrealistic for the home cook....unless you own a restaurant.

And beside this is quick easy, less chopping time.

EASY TUNA SALAD

1 Can Tuna
1 Tablespoon Mayonnies
1 celery stick
1 quarter of a white onion.

MEATHOD:

Drain tuna, plop tuna in bowl.
Take the celery stalk and cut in half down the middle. Then dice.  Chop until you have small bite size piece. Don't worry about being prefect.   Cut up the onion and chop to.    If you add it to the tuna and your thinking hmmm maybe a little bit smaller.  The next time you make it chop it smaller.  Add the chopped onion and celery to the tuna and add the Mayonnies.   Stir in Mayo and eat.
So easy you can almost do it blind folded.  And if you had little one that want to learn to start making stuff his is a great recipe. 

Quick and Easy. 
ENJOY!

Thursday, May 12, 2016

BASIC TOMATO PASTE IDEAS

This is my favorite brand of tomato paste.  I use to work at a pizza shop and we did a lot of experimentation and to me and my taste buds Contadina wins out.   Except we were using about 4 pounds of it with other ingredients.  So were sticking to the 8oz can.

Yes this post involves soup broth or stock if your wondering.

In the beginning of my culinary experimentation I was literally flying blind.  I had no clue how to cook, heck I didn't even have a recipe book.  I can't not say I was taught by my mother or any family member. She still confused to how I manged to learn.   Trial and Error.  12 years later and here we are.  And this is what has gotten me though the thin times.

Ok first here is how I open the can.  Use the can opener on the top and bottom.  Then with one shake it all come out into the pan.  No pushing or scooping.
 
And here is something to thing about the 8 oz tomato paste it concentrated. So in this little can you can get a lot more bang for your buck.  

You can use water if you want, but I highly recommend broth or stock if you have any hiding in your freezer.  So here we go.

Add one cup of water, broth or stock to the tomato paste and turn to medium.  Yes it will spit and spatter.  So stir in the liquid with a wooden spoon.  As soon as you see all the liquid be absorbed add another cup of liquid.  Stir Stir Stir.  And this is a good time to add your spices.  The more the merrier is what I say.  You'll see the liquid get absorbed and the volume of tomato pate will triple in volume.

Now like the gravy recipe you have to decide what stage you want to stop.  You can add more liquid and it's amazing how much this can absorb.  

Oh no I added too much liquid it's too watery!!!!! No big deal Freeze it and they next time you make tomato paste as above thaw out the oops and add it to the tomato paste.  Now you will have a lot of tomato paste mind you, but it will be ready right away.  

How to thaw out frozen tomato paste.    You can defrosted in the microwave on a defroster mode.  Or the old fashion way is plop it out of the container into a pot with one cup of water, turn on Medium low and let defrost that way.  I like doing it that way it save the flavor.  

Have fun creating your own version. Maybe you have a time honoured tradition of making a spicy or mild soup I have never heard of.  You are the master of your ship.  :)

Sunday, May 8, 2016

FOOD PRECEPTION

FOOD PERCEPTION

What ever culture you're from not only are you raised to like certain flavors and tastes, you are also raised to view your food in a certain light, because it's all you know.   You might look at a hamburger and get grossed out, but consider tripe to be very yummy and pleasing or visa versa. 

We live in a world surrounded by food, weather it's an out door market or a large supermarket.  And when we shop we shop with our eyes, nose and fingers.  Squeezing, smelling, and judging our prey.  
Some people pass up very good tasting food, because it dose not look good. When in fact it's awesome.    

Bananas are a great example of this.   So many people reject the bananas with the dark spot, oh that bad.  No it's not it's excellent.  For baking and making pancakes or what not.

Heirloom tomatoes are another great example they look awful and misshapen and weird again their awesome.   

Apples off the tree don't shine and they look ill, but once you try it your hooked.  
We have a small grove, small like 9 trees.   Which we shared with a group of deer.  One year we had 2 drunk deer and 1 drunk buck they had eaten the fermented apples.  See even the deer know. ;)

 If you go back far enough in our food history books and presented all the food to the current population, no one would eat it. It looks that different.  For instance Crap apples the mother of all apples looks like a cherry and taste some what like a very, very mild apple.  

Humans are highly visual and we want to see what our food looks like before we eat it. There are thousand upon thousand of food pictures uploaded to site's on the internet.  Some we look at and go eww others make up gain a few pounds and we can smell it, even though it's all in our head. 

But here is something to chew on.   Some times the best looking pictures of food are the blandest not flavorful at all and the food that looks really yucky and unappetizing is actually more flavorful.    Lot's or curries, and stew don't look so hot when photographed, but in reality they got tons of flavor. 

So when your viewing your culinary delights don't judge it on the visual, but try the recipe and judge it on the flavor.  

Monday, May 2, 2016

BASIC MEAT RECIPE

BASIC MEAT RECIPE

I'm going to slow down a little and do a little more basic cooking skills.  All these recipes will have very simple titles that all start with basic.  So if you type Basic into the top left hand corner search bar they will appear right away.   So here we go.

INGREDIENTS:
1 Sweet onion
2 pounds of meat.  
Spices
4 to 5 Garlic 
Taco Seasoning.
1 1/2 cups water or stock. 
1 Table spoon olive oil.

 Chop one onion and slice garlic.
Basically peel the onion chop it in half and do what you got to do until it resembles little bit.  Don't worry about being exacting.   But make sure you chop slowly and push the onions into a square on the cutting board and chop some more.  High speed chopping might result in more onion every were and less onion in the pan.
Add olive oil and garlic.
 Turn burner to Medium.
Saute until every thing look shiny.  Do not worry about being exacting.   Either way it's all going to cook.  Put it this way you could put the meat into the uncooked garlic and onions and it's still going to cook.  Sauteing just make you a cooler cook.

Add the meat with spices. Cumin, Paprika, Cinnamon, Pepper, Thyme.  And add the water. If you have stock or broth add that instead.  I add water here.    Burner is still on medium.


 Mix and chop up the meat.


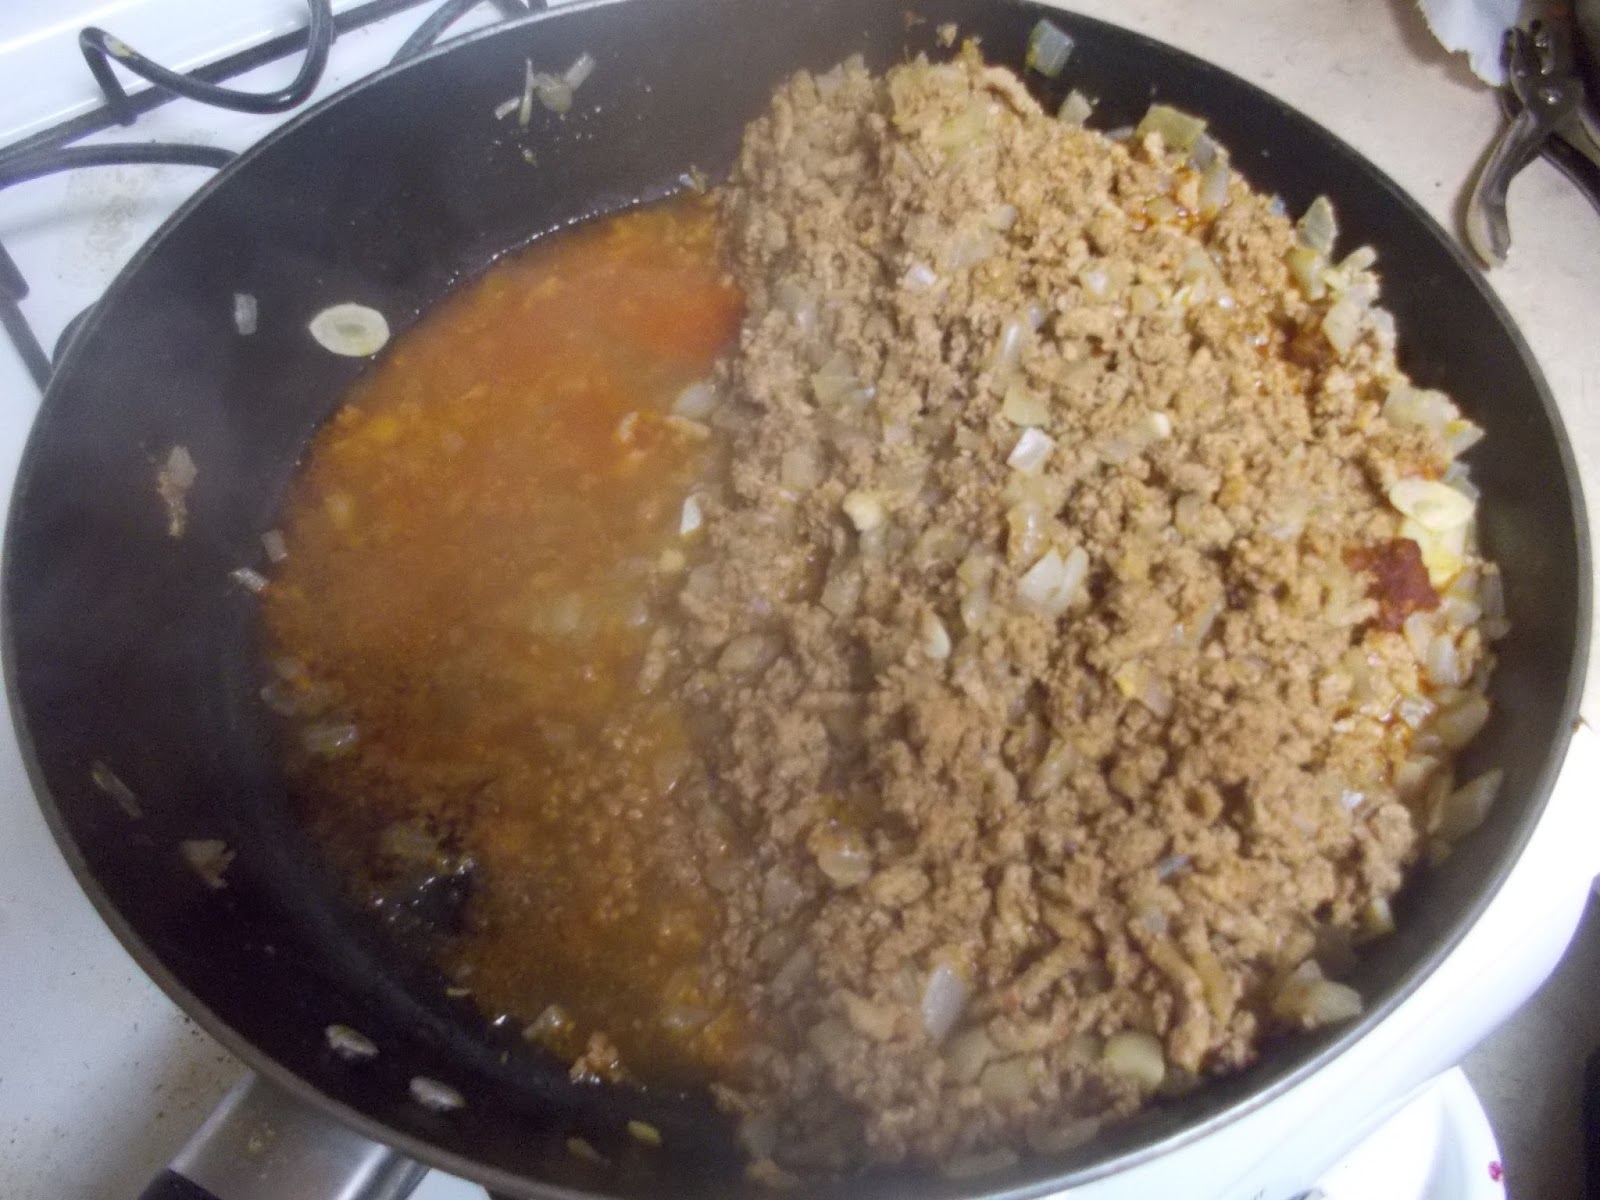
 Ok I know what your thinking wholly crap what mess did I just make.  Don't worry let it cook. the                                                                                     water keeps the meat from burning and helps                                                                                           remove the grease.
 As you can see the pink is disappearing and turning brown.  Keep breaking it apart as it cooks.  Still on Medium.
 Add Taco seasoning if desired.
                                                                                  Mix in.   Cover and turn to low.  If you                                                                                                     want you can cook it another 15 minutes to 30                                                                                         minutes if you want.  The longer the better. But                                                                                       that's up to you.  You can see all the grease                                                                                               floating on the top.  And their is no more pink.

 Move all the meat over to one side.  Were going to remove all the grease, or as much of it as possible.

Tilt the pan so the grease goes to one side and can be dipped out.


Have a bowl and ladle and sieve ready.

 Yuck.  
 Any can will do. Pour grease into the can and freeze. This makes throwing it away a lot easier.
Wha-la  Cooked meat that can be used for tons of yummy things.  spaghetti, tacos, dim sum..... the list is endless.   And the neat thing is you can make it your own.  This is just guide lines.
If you choose to freeze some, make sure you cool it down before you put it in the freezer.


And one more tip.  If you want to get more bang for your buck.  When the meat is cooled.  On a clean cutting board add a cup at a time and dice it will a knife, to make it smaller.

 :)